
eSIM for Philippines
Choose Your Plan
Note: Please note, all BazTel plans are prepaid and come with no surprise fees. Confirm your device supports eSIM before purchasing.

Key Features
 Data Allowance:Choose from flexible options—1GB, 3GB, 5GB, 10GB, 20GB or 50 GB—tailored to your travel duration. Regional availability may vary. Validity Period:Select plans valid from 1 to 180 days, ideal for weekend getaways or extended international stays. SIM Type:eSIM-only for instant activation. No physical SIM required—just scan your QR code to connect immediately. Data Speed:Enjoy fast 4G/LTE and 5G (where available). Speeds vary by network conditions and coverage area. Tethering/Hotspot:All plans include hotspot capability to share your connection with laptops, tablets, and other devices. Coverage:Reliable service in urban centers and most rural locations through partnerships with top local carriers. Network Provider:Automatic connection to the strongest available network—no manual switching required. Mobile Plan Type:Prepaid data-only plans with transparent pricing—no contracts or surprise fees. Mobile Number:Data-only service without a phone number. Use VoIP apps like WhatsApp for calls and messages. Plan Activation:Activation begins only when you connect to a local network—no wasted days. Voice Calls:Make calls through internet-based apps (WhatsApp, FaceTime, etc.) using your data allowance. Delivery:Instant email delivery of your eSIM QR code—ready to scan and activate immediately. Installation Process:Simple QR code scanning via your device camera—no physical SIM card handling. eSIM Activation:Automatically activates after installation—just toggle mobile data to start browsing. Compatibility:Supports most modern eSIM-enabled smartphones, tablets, and wearables. Verify device support before purchase.
Description
![]() Budget Friendly Connectivity:
Budget Friendly Connectivity:
![]() No KYC Required:
No KYC Required:
![]() Security:
Security:
![]() 24/7 Support:
24/7 Support:
![]() Unlimited Plan with Fair Usage Policy:
Unlimited Plan with Fair Usage Policy:
Technical Details
![]() Network:
Network:
![]() Plan Type:
Plan Type:
![]() Top Up:
Top Up:
![]() Connectivity:
Connectivity:
![]() Activation Policy:
Activation Policy:
![]() Supported Countries:
Supported Countries:
Additional Information
![]() No Hidden Fees:
No Hidden Fees:
![]() Secured Payments:
Secured Payments:
![]() Refund Policy:
Refund Policy:
![]() Travel Cancellation:
Travel Cancellation:


Advantages of eSIM
Skip physical SIM cards and store visits with eSIM in Philippines. Just scan, activate, and connect instantly on supported devices.

Switch Plans Anytime
Easily change data plans or carriers with Philippines eSIM—no need to physically swap SIM cards when your usage needs evolve.

Travel-Friendly Setup
Traveling internationally? Buy data packages in advance and activate them right when you land in your next destination.

Dual SIM Convenience
Use both your physical SIM and Philippines eSIM together on compatible devices—perfect for balancing local and travel connectivity.
No discount available!


Benefits of BazTel eSIM
Enjoy seamless connectivity with these travel-friendly advantages wherever you go.

Instant Activation
No waiting for shipments. Activate your Philippines eSIM prepaid instantly by scanning the QR code—ready in minutes.

Wifi Hotspot
Transform your device into a portable hotspot while using your Philippines eSIM—share data with other devices effortlessly.

Top-up Availability
Need more data? Instantly recharge directly from your phone—eliminating the need for physical top-up cards.

24x7 Customer Support
BazTel provides round-the-clock support, ensuring assistance whether you're exploring the Philippines or traveling abroad.

How to Install BazTel eSIM in iPhone?
Get your Philippines eSIM working in minutes with these simple steps.
Buy & Receive QR Code
Select your perfect Philippines data package and get your QR code emailed instantly.
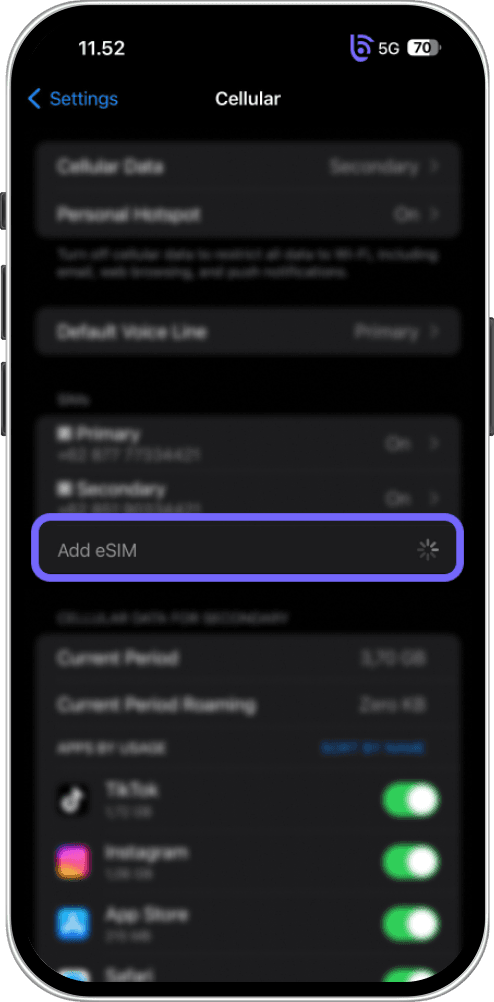
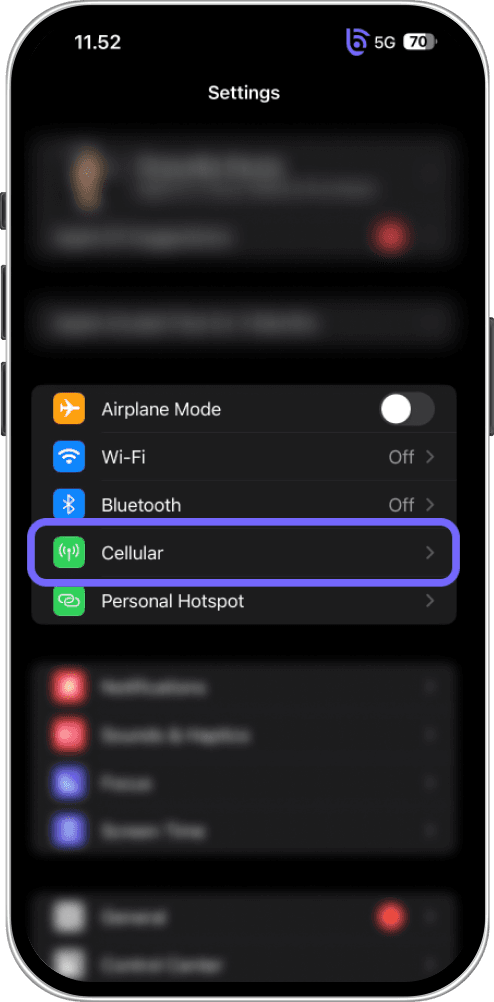
Open Settings
Go to Settings > Cellular, then tap Add Cellular Plan to begin setup.
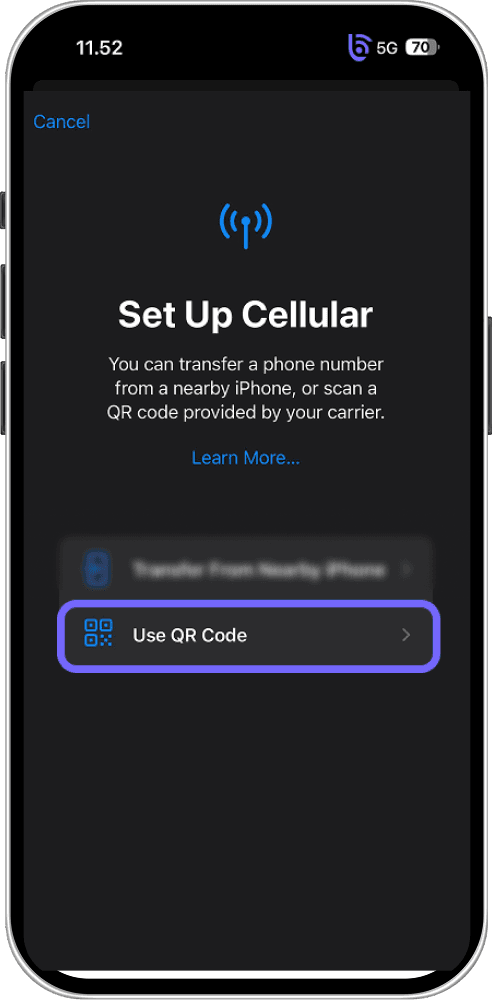
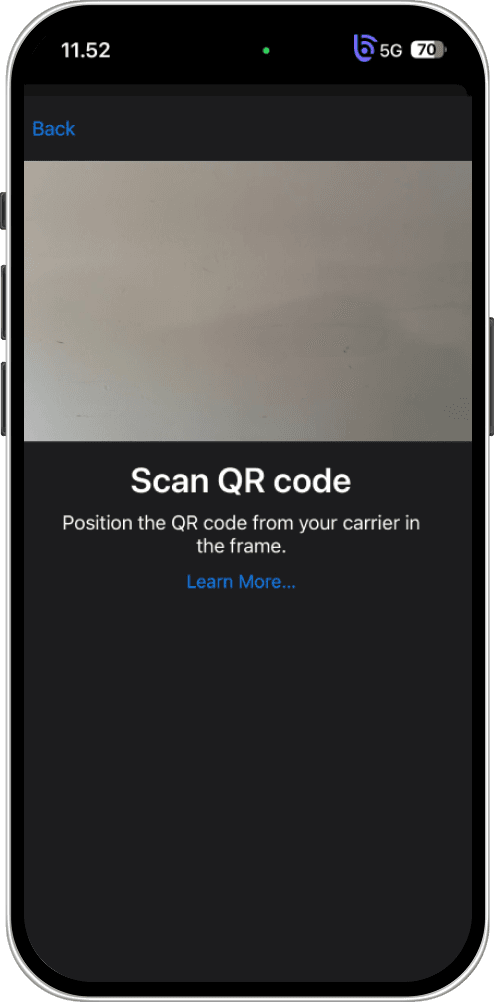
Scan the QR Code
Use your iPhone camera to scan the code from your email and follow the prompts.
Activate and Connect
Choose your eSIM as primary data and toggle mobile data on. Your Philippines connection is ready!
How to Install BazTel eSIM in Android?
Activate your Philippines eSIM quickly with these steps.
Purchase & Receive QR Code
Pick your Philippines plan and receive the QR code by email immediately.
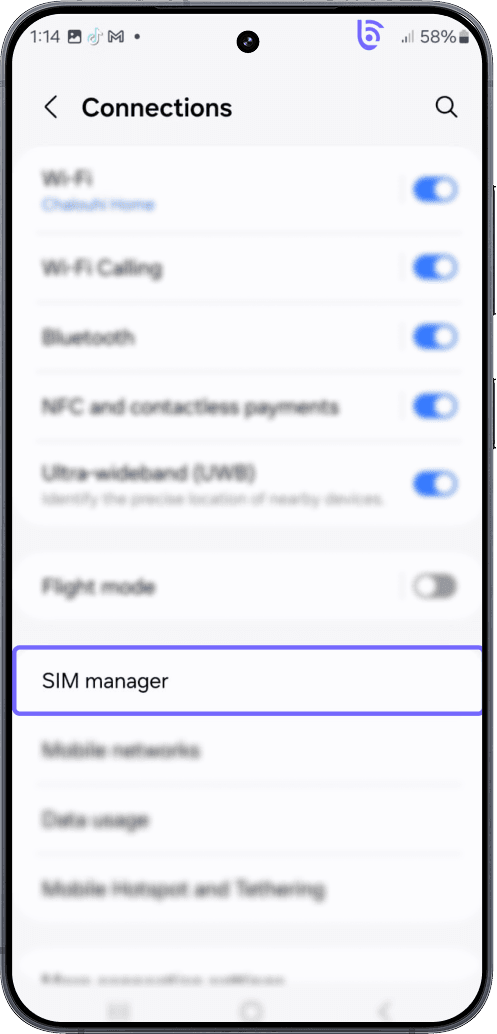
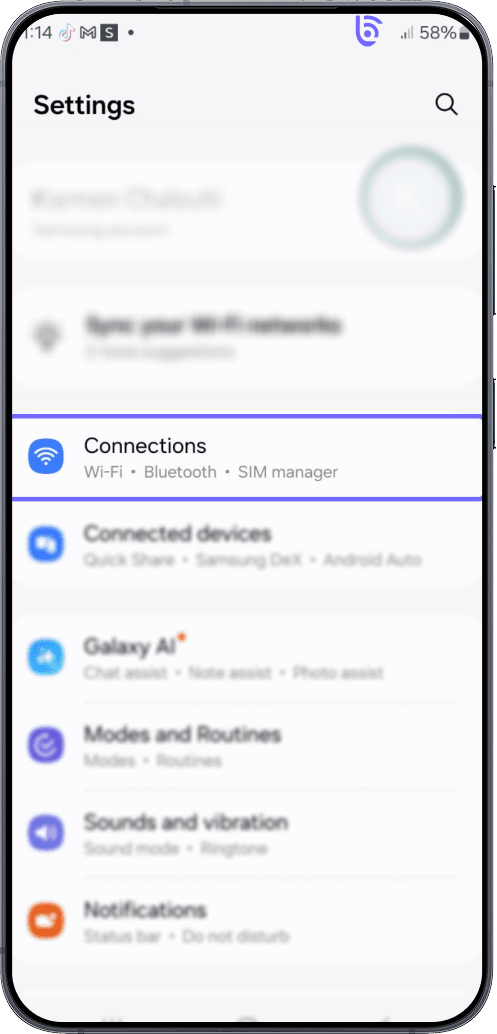
Open Network Settings
Navigate to Settings > Connections > SIM manager and select Add eSIM.
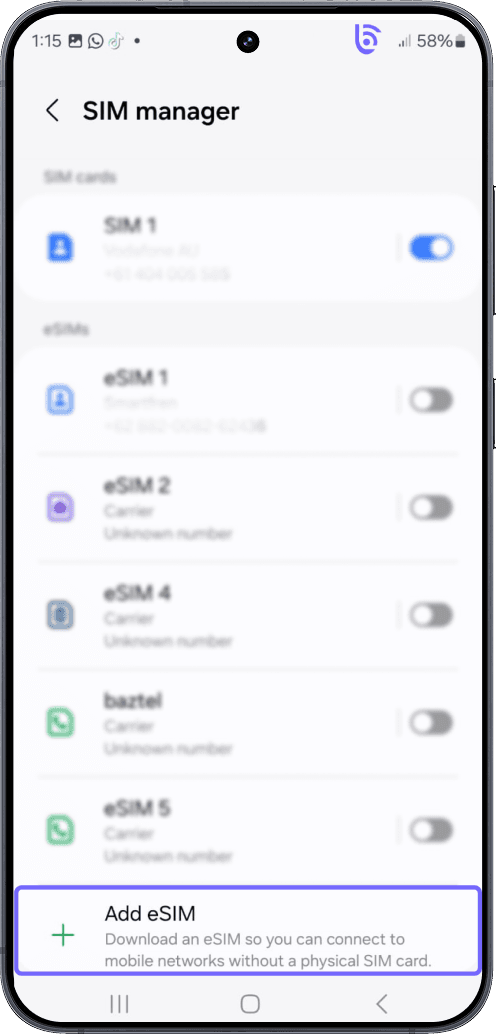
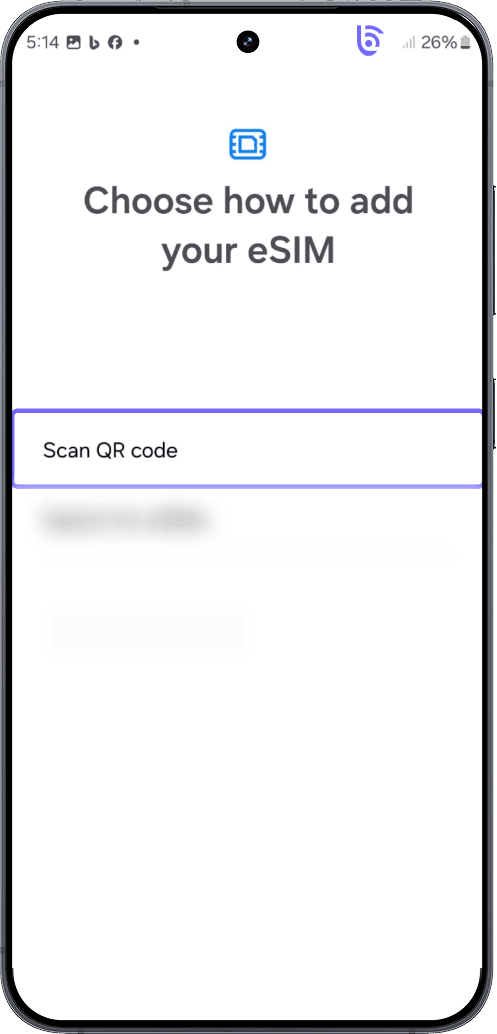
Use the QR Code
Scan the emailed code with your Android camera to complete installation.
Activate & Start Browsing
Enable your eSIM and mobile data to begin using your Philippines connection.

Why Choose an eSIM for Philippines
Exploring the Philippines? Discover how an eSIM makes traveling smarter and simpler.

Your Trip to Philippines Starts Smoothly with an eSIM
Ditch costly roaming fees. Set up your Philippines eSIM before departure and connect the moment you land.

Your Return Trip Stays Connected with a Local Plan
Returning to the Philippines? Just top up your existing eSIM—instant connection without the hassle.