Botswana
 Zambia
 Congo
Congo Colombia
 China mainland
 Chile
Chile Chad
Chad Central African Republic
 Canada
 Cameroon
 Cambodia
 Burkina Faso
 Bulgaria
 Brunei Darussalam
 Brazil
 Aland Islands
 Bosnia and Herzegovina
 Bolivia
 Belgium
 Belarus
 Bangladesh
 Bahrain
 Azerbaijan
 Austria
 Australia
 Armenia
 Argentina
 Algeria
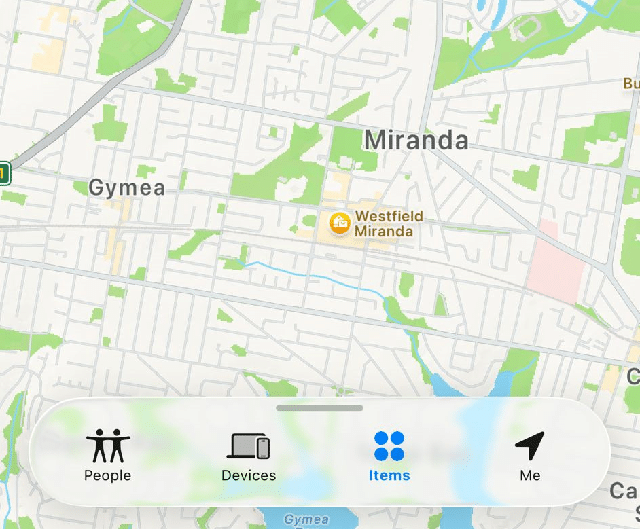
Last month, I rushed to the Apple Store to trade in my old iPhone 13 for an upgrade. The store associate took one look at my device, tapped a few settings, and handed it back with a polite smile. “You’ll need to turn off Find My iPhone first,” she said. I felt my face flush—I’d completely forgotten this crucial step.
That experience taught me something important. Disabling Find My iPhone isn’t just a checkbox on your pre-sale to-do list. It’s about understanding how Apple’s security features work, why they exist, and when you actually need to turn them off. Whether you’re selling your device, troubleshooting connectivity issues, or simply want more control over your privacy, knowing how to properly disable this feature saves time and headaches.
What Find My iPhone Actually Does
Find My iPhone is Apple’s built-in tracking feature that helps you locate your device if it goes missing. When you activate this service, your iPhone connects to Apple’s network and shares its location with your Apple ID. This means you can log into iCloud from any computer or use another Apple device to see exactly where your phone is on a map.
The feature does more than just track location. It enables Activation Lock, which prevents anyone else from using your iPhone without your Apple ID password. If a thief grabs your phone, they can’t simply erase it and sell it as their own. This security layer has made iPhone theft far less profitable, which is exactly what Apple intended.
But here’s where things get interesting. Find My iPhone also lets you share your location with friends and family, play sounds to locate a misplaced device nearby, and remotely erase your personal data if your phone is truly gone. All of these features tie back to your Apple account, which is why disabling the feature requires your password—it’s a security measure to ensure only you can make that change.
When You Should Disable Find My iPhone
Before we jump into the how-to steps, let’s talk about when disabling Find My actually makes sense. The most common scenario is selling or trading in your iPhone. Without turning off this feature, the next owner won’t be able to activate the device. Trade-in companies like Verizon, Apple, and carriers will reject phones that still have Find My enabled because of Activation Lock.
You might also need to disable Find My iPhone before getting your device serviced or repaired. Apple requires this to verify you’re the legitimate owner before they work on your phone. Some troubleshooting steps for software issues also require turning off the feature temporarily.
Privacy is another valid reason. If you’re traveling and don’t want anyone tracking your location, or if you’re lending your phone to someone and want to maintain boundaries, disabling location sharing makes sense. Frequent flyers should also think about whether using an eSIM instead of roaming fits their travel habits. Just remember that turning off Find My iPhone is different from stopping location sharing with specific contacts—we’ll cover both.
The Standard Method: Disabling Find My on Your iPhone
The straightforward way to disable Find My iPhone is directly on your device. This works when you have your phone in hand and remember your Apple ID password. Start by opening the Settings app from your home screen. Tap your name at the very top to access your Apple Account settings.
Scroll down and tap Find My. You’ll see a screen with several options, but the one you want is Find My iPhone. Tap that, and you’ll find a toggle switch. When you tap to turn it off, iOS will prompt you to enter your Apple ID password. This isn’t Apple being difficult—it’s a security feature to prevent thieves from disabling the tracking on a stolen device.
After entering your password correctly, tap Turn Off. The feature will deactivate, and your device will automatically be removed from Activation Lock. This process usually takes just a few seconds. You’ll know it worked when the toggle switch appears gray instead of green.
One thing I’ve learned from personal experience: make sure you’re connected to a stable internet connection before starting this process. I once tried disabling Find My on a spotty café WiFi, and the request timed out, leaving me confused about whether it actually turned off or not.
When Find My iPhone Is Greyed Out: The Stolen Device Protection Problem
Here’s where many people hit a wall. You navigate to the Find My iPhone settings, ready to toggle it off, but the switch is greyed out. You can see it, but you can’t tap it. This happened to me when helping a friend prepare their iPhone for sale, and it was frustrating until we figured out the culprit.
The most common reason Find My iPhone appears greyed out is Stolen Device Protection. Apple introduced this feature in iOS 17.3, and it’s designed to protect your account if someone steals your phone and knows your passcode. When this feature is active, it prevents changes to critical security settings unless you’re in a familiar location like home or work.
To disable Stolen Device Protection, go to Settings and tap Face ID & Passcode (or Touch ID & Passcode if you have an older iPhone with a Home button). Enter your passcode when prompted. Scroll down until you find Stolen Device Protection and tap it. You’ll see a toggle to turn it off.
Here’s the catch: if you’re not at a familiar location, iOS will trigger a Security Delay. This means you’ll need to wait up to one hour before you can actually turn off the feature. During that hour, you can use your phone normally, but the change won’t complete until the delay expires. After the hour passes, you’ll need to authenticate again with Face ID or Touch ID to confirm.
This security delay might seem annoying, but it’s actually brilliant. If a thief steals your phone at a bar and knows your passcode, they can’t immediately disable all your security features and lock you out. The delay gives you time to mark your device as lost or change your Apple ID password.
Other Reasons Find My Might Be Greyed Out
Stolen Device Protection isn’t the only potential blocker. Screen Time restrictions can also prevent you from toggling Find My iPhone. If you (or a parent, if it’s a family device) enabled Content & Privacy Restrictions in Screen Time, certain settings become locked.
To check this, open Settings and tap Screen Time. If it’s enabled, tap Content & Privacy Restrictions. Look for Location Services under the Privacy section and make sure it’s set to Allow Changes. Without this permission, you won’t be able to modify Find My settings.
Sometimes the issue is simpler—Location Services itself might be turned off. Find My iPhone requires Location Services to function, so if that’s disabled, the Find My toggle won’t work. Navigate to Settings, then Privacy & Security, and tap Location Services. Make sure the main toggle at the top is turned on. Then scroll down to Find My and ensure it’s set to While Using the App.
Low Power Mode can occasionally interfere with Find My settings as well, though this is less common. If you’ve exhausted other troubleshooting options and Find My is still greyed out, try disabling Low Power Mode temporarily (Settings > Battery > Low Power Mode). If you’re juggling multiple lines, also review how you switch between different eSIM plans on your phone so you don’t confuse connectivity issues with Find My restrictions.
Disabling Find My Remotely Via iCloud
What happens if you’ve already shipped your iPhone to a trade-in company or sold it to someone, and you just realized Find My is still on? Don’t panic—you can disable it remotely using iCloud, though the process is slightly different. The same kind of careful planning applies if you’re moving an eSIM from iPhone to Android, where you often need to reactivate the plan rather than literally “copy” it across.
On a computer or another device, navigate to iCloud.com/find and sign in with your Apple ID. You’ll see a map with all your devices listed. Click All Devices at the top, then select the iPhone you want to remove. If the device is online, you’ll see options to play a sound, enable Lost Mode, or erase the device.
Click Erase iPhone first. This wipes all your data remotely. You don’t need to enter a phone number or message since you’re not actually trying to recover a lost phone—you’re just clearing it for the next owner. Once the erase completes (which happens immediately if the phone is online, or the next time it connects to the internet if it’s offline), you’ll see a new option: Remove from Account.
Click that, and your iPhone will be removed from your Apple ID. This disables Activation Lock and allows the new owner to set it up with their own account. I’ve used this method twice when helping family members who forgot this step before trading in their devices, and it works smoothly as long as you know your Apple ID password.
Stopping Location Sharing Without Disabling Find My
This is a point of confusion I see constantly: people think they need to turn off Find My iPhone completely when they really just want to stop sharing their location with certain contacts. These are actually separate features, and you can control location sharing much more granularly.
To stop sharing your location with everyone, open Settings and tap your name. Go to Find My, then toggle off Share My Location. This stops broadcasting your location to friends and family, but it keeps Find My iPhone active for device tracking. Your friends won’t get a notification that you stopped sharing, but if they open the Find My app, they’ll see “Location Not Available” next to your name.
If you only want to stop sharing with specific people, open the Find My app and tap the People tab at the bottom. Select the person you want to stop sharing with, scroll down, and tap Stop Sharing My Location. This removes them from your location-sharing list without affecting anyone else or disabling the device-finding features.
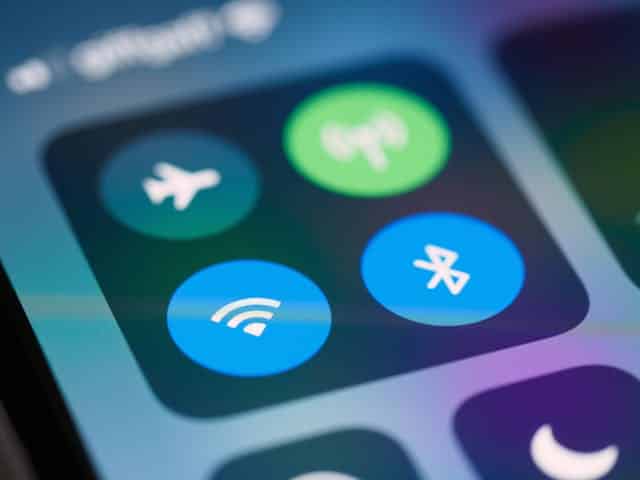
There’s also Airplane Mode, which is a temporary solution. When you enable Airplane Mode, your iPhone stops transmitting location data (unless you’re connected to WiFi). This can be helpful during flights or when you want privacy without making permanent changes to your settings. Just remember that Airplane Mode also disables cellular service, so you won’t receive calls or texts unless you’re on WiFi. For more on when to use data roaming and how to avoid unexpected fees abroad, see our complete guide to data roaming costs and settings.
The Activation Lock Connection
Understanding Activation Lock is crucial because it’s directly tied to Find My iPhone. When you enable Find My, Activation Lock turns on automatically. This lock links your iPhone to your Apple ID and prevents anyone from erasing your device, disabling Find My, or activating and using your phone without your password.
This security feature has made stolen iPhones essentially worthless to thieves. Even if they manage to guess your passcode, they can’t bypass Activation Lock without your Apple ID credentials. That’s why trade-in companies and buyers require you to disable Find My before they’ll accept a device—they need confirmation that the phone isn’t stolen and will actually work for the next owner.
When you turn off Find My iPhone using any of the methods I’ve described, Activation Lock is automatically removed. Your device is then ready to be set up as new by whoever gets it next. This is exactly what happened at that Apple Store when I forgot to disable Find My—the associate couldn’t complete my trade-in because Activation Lock prevented them from resetting the phone.
If you buy a used iPhone and it’s still activation locked, you’re in a difficult position. The previous owner needs to either remove the device from their iCloud account remotely, or provide you with their Apple ID password so you can disable Find My. Without one of those solutions, the phone is essentially a brick. This is why it’s critical to check for Activation Lock before buying any used Apple device and confirm details like whether models such as the iPhone 13 support eSIM the way you expect.
What Happens After You Disable Find My
Once Find My iPhone is off, several things change immediately. Your device disappears from the Find My app on your other Apple devices and on iCloud.com. You can no longer locate this iPhone on a map, play sounds to find it, or remotely erase it. For many people, this feels uncomfortable—you’re losing a safety net.
The location sharing you set up with friends and family also stops. They won’t see your location anymore when they open Find My or check in Messages. Apple doesn’t send them a notification, but if they specifically look for you, they’ll see that your location is unavailable.
Activation Lock is removed, which means anyone with physical access to your iPhone could erase it and set it up as their own device. This is why disabling Find My should be one of the last steps before selling or giving away your phone, not the first. Make sure you’ve backed up your data and removed any sensitive information before you turn off this security feature.
Battery life might improve slightly after disabling Find My, though the difference is usually marginal. The feature does use Location Services in the background, which consumes a small amount of battery. But unless you’re desperately trying to squeeze out every last minute of charge, this probably won’t be noticeable. If you rely on multiple lines for travel or work, it can be more impactful to learn how many eSIMs an iPhone can store and use so you can manage connectivity more efficiently.
Before You Sell: The Complete Checklist
Disabling Find My iPhone is just one step in properly preparing your device for a new owner. Here’s the complete sequence I follow every time I trade in or sell an iPhone, learned through a combination of Apple’s recommendations and my own mistakes.
Required Steps:
First, back up your iPhone using either iCloud or your computer. This ensures you don’t lose photos, messages, or app data. I prefer iCloud backups because they’re automatic and encrypted, but computer backups via Finder (on Mac) or iTunes (on Windows) work just as well. While you’re in Settings, it’s a good moment to review or activate eSIM service on your iPhone if you’re planning to use digital SIMs on your next device.
Next, sign out of iCloud by going to Settings, tapping your name, scrolling to the bottom, and selecting Sign Out. This removes your Apple ID from the device and automatically disables Find My iPhone as part of the sign-out process. You’ll be prompted to enter your Apple ID password to turn off Find My—enter it to proceed.
If you use iMessage, deregister your phone number before removing your SIM card. This prevents text messages from getting stuck trying to send as iMessages to your old device. Go to Settings, tap Messages, and turn off iMessage. If you’re switching to Android, also visit Apple’s website to deregister your number from iMessage completely.
Remove any payment cards from Apple Pay by opening the Wallet app and deleting each card. Erase all content and settings by going to Settings > General > Transfer or Reset iPhone > Erase All Content and Settings. This wipes everything and leaves your iPhone ready for its next owner to set up from scratch. Before you erase, double‑check what it means if you delete an eSIM from your phone, since some plans can’t be recovered without carrier support.
Finally, remove your physical SIM card if you have one (newer iPhones use eSIM, so skip this step if that applies to you). If you’re ready to go digital-only, you can transfer a physical SIM card to an eSIM before moving on. Keep the SIM for your new phone or dispose of it securely.
Common Questions and Concerns
One question I hear frequently: can you turn off Find My iPhone without the password? The short answer is no. Apple requires your Apple ID password as a security measure to prevent thieves from disabling tracking on stolen devices. If you’ve forgotten your password, you’ll need to reset it using Apple’s account recovery process at iforgot.apple.com before you can disable Find My.
Another common worry: what if I disabled Find My, but my friend can still see my location? This usually means you shared your location through Messages rather than (or in addition to) the Find My app. Open a conversation with that person in Messages, tap their name at the top, and look for location-sharing settings. You may need to stop sharing there separately.
People often ask whether disabling Find My will erase their phone. It won’t. The feature only controls tracking and Activation Lock—your data stays intact until you explicitly erase the device. That said, you should always back up before making major changes to your iPhone settings, just to be safe. While you’re reviewing privacy and security, it’s also worth checking your blocked list and knowing how to unblock a number on iPhone so you don’t miss important calls by accident.
What about turning Find My back on? You can re-enable it anytime by reversing the process. Go to Settings > [your name] > Find My > Find My iPhone and toggle it on. Your device will rejoin your Find My network immediately.
Why This Matters More Than You Think
Beyond the practical need to disable Find My when selling your iPhone, understanding this feature gives you more control over your digital privacy. Location tracking has become so normalized that we often forget we’re constantly broadcasting where we are. Taking the time to review who can see your location, when Find My is active, and how Activation Lock protects your data puts you in the driver’s seat.
I’ve also noticed that knowing how to navigate these settings makes me more confident when helping family and friends with their devices. My parents recently upgraded their phones, and I walked them through the entire process of disabling Find My, backing up their data, transferring their eSIMs to the new phones, and setting up their new iPhones. Being able to explain not just the “what” but the “why” helped them feel more comfortable with technology rather than intimidated by it.
The security landscape for smartphones keeps evolving. Features like Stolen Device Protection show that Apple is actively responding to new threats and theft techniques. Staying informed about these changes means you can take advantage of protective features when you need them and disable them appropriately when you don’t.
Final Thoughts
Disabling Find My iPhone isn’t complicated, but it does require intention and a clear understanding of what you’re doing. Whether you’re preparing to sell your device, troubleshooting a greyed-out setting, or managing your location privacy, the core principle remains the same: you’re in control of your iPhone’s security features.
The few minutes it takes to properly disable Find My and prepare your device for its next chapter are worth it. You’ll avoid the embarrassment of having your trade-in rejected, protect the new owner from activation lock headaches, and ensure your personal data doesn’t end up in the wrong hands.
If there’s one thing I hope you take away from this guide, it’s that these security features exist for good reasons. Use them while you own your device, and disable them thoughtfully when it’s time to move on. Your future self (and whoever gets your old iPhone) will thank you.

Blog Author
Peter
Peter started BazTel.co to make mobile internet easier for travellers. He noticed how tough it was to find good network options while visiting new countries. That’s when he built BazTel — a place where anyone can buy eSIMs online without confusion or long steps. He believes tech should be simple and useful, not complicated. When he’s free, he likes to travel, test BazTel himself, and keep improving it based on real user problems.