 Botswana
 Zambia
 Congo
Congo Colombia
 China mainland
 Chile
Chile Chad
Chad Central African Republic
 Canada
 Cameroon
 Cambodia
 Burkina Faso
 Bulgaria
 Brunei Darussalam
 Brazil
 Aland Islands
 Bosnia and Herzegovina
 Bolivia
 Belgium
 Belarus
 Bangladesh
 Bahrain
 Azerbaijan
 Austria
 Australia
 Armenia
 Argentina
 Algeria
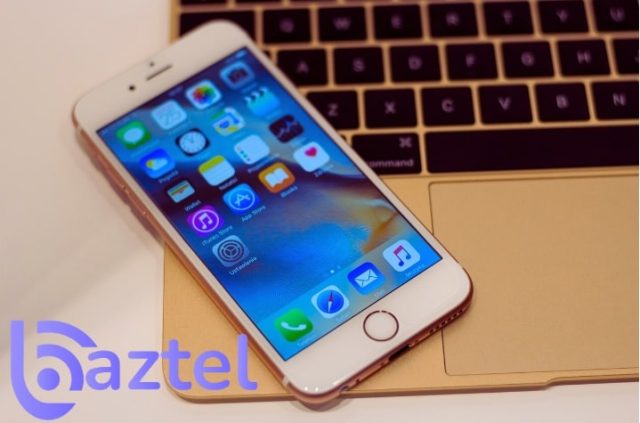

iMessage has become an essential communication tool for Apple users worldwide, offering a seamless way to send messages, photos, videos, and more across Apple devices. Whether you’ve just purchased a new device, switched carriers, or are experiencing activation issues, understanding how to enable iMessage properly is crucial for staying connected. This comprehensive guide will walk you through everything you need to know about activating and troubleshooting iMessage on your iPhone.
What is iMessage and Why It Matters
iMessage is Apple’s proprietary messaging service that allows users to send messages over the internet rather than through traditional SMS networks. Unlike standard text messages that appear in green bubbles, iMessage conversations display in blue bubbles, indicating you’re using Apple’s enhanced messaging platform. The service offers features like read receipts, typing indicators, end-to-end encryption, and the ability to send high-quality media files without compression.
For travelers using services like BazTel’s travel eSIM, iMessage becomes even more valuable. Since iMessage works over Wi-Fi or mobile data, you can continue messaging your contacts without incurring international SMS charges, making it an ideal solution for staying connected while abroad.
Understanding iMessage Requirements
Before attempting to enable iMessage, it’s important to understand what the service requires to function properly. iMessage requires an active internet connection—either through Wi-Fi or mobile data—and a valid Apple ID. Your device must also be running a compatible version of iOS, and your carrier must support iMessage activation. Additionally, your date and time settings should be set correctly, as incorrect settings can prevent proper activation.
How to Enable iMessage: Step-by-Step Instructions
Initial Setup and Activation
To activate iMessage on your iPhone, start by locating the Settings app on your home screen. Once you open Settings, scroll down until you find the Messages option and tap Messages to access the iMessage settings. Inside this menu, you’ll see a toggle switch next to iMessage. Tap the toggle to turn on iMessage, and the switch should turn green, indicating that the iMessage service is now activating.
The activation process typically takes a few moments, but it can sometimes take up to 24 hours depending on your carrier and network conditions. During this time, you’ll see a message stating “Waiting for activation.” Ensure your iPhone is connected to either Wi-Fi or has an active mobile data connection, as iMessage activation requires internet connectivity.
Configuring Your Apple ID for iMessage
After you enable iMessage, the system will automatically attempt to activate it using your phone number. To fully configure the service, go to Settings and tap Messages again. Look for the section labeled “Send & Receive” and tap it. Here, you’ll see your Apple ID and the contact information (email addresses and phone numbers) that can be used to send and receive messages through iMessage.
Make sure your Apple ID is signed in correctly. If you see a “Use your Apple ID for iMessage” option, tap it and sign in with your credentials. You can select which email addresses and phone numbers you want to use with iMessage by checking the boxes next to each one. Your primary contact method for iMessage will be highlighted—this is where other Apple users will see messages coming from when you send them.
Troubleshooting Common iMessage Activation Problems
Why Is My iPhone Saying iMessage Is Not Enabled?
If your iPhone displays a message saying iMessage is not enabled, several factors could be causing the issue. The most common reason is a lack of internet connection. iMessage requires either a Wi-Fi connection or active mobile data to activate and function. Check that your device is connected to the internet by opening Safari or another app that requires connectivity.
Another frequent cause is Apple ID authentication issues. If you’re not signed in with your Apple ID, or if there’s a problem with your account, iMessage won’t activate properly. Go to Settings, tap on your name at the top, and verify that you’re signed in to iCloud with your Apple ID. If you see any alerts or warnings, address them before attempting to enable iMessage again.
Carrier restrictions can also prevent iMessage activation. Some carriers, particularly in certain regions, may not fully support iMessage or may require specific settings. Contact your carrier to confirm that iMessage is supported on your plan. If you’re using a travel eSIM from BazTel, ensure that your data connection is active and working properly, as this will allow iMessage to activate over your internet connection.
How Do I Enable My iMessage Again After Deactivation?
If iMessage was previously working but has stopped, you may need to deactivate and reactivate it. To do this, open Settings and tap Messages. Find the iMessage toggle and switch it off, then wait about 30 seconds before you toggle iMessage back on. This simple reset often resolves minor glitches that prevent the iMessage service from working properly.
During reactivation, make sure you’re connected to a stable internet connection. If you’re using Wi-Fi, ensure you have good Wi-Fi coverage and that the network isn’t blocking Apple services. If you’re using mobile data, verify that you have sufficient data allowance and that cellular data is enabled for the Messages app. You can check this by going to Settings, selecting Cellular or Mobile Data, and scrolling down to confirm that Messages has data access enabled.
Advanced Troubleshooting: Reset Network Settings
If basic troubleshooting doesn’t resolve your iMessage issues, you may need to reset network settings. This process clears all saved Wi-Fi networks, VPN configurations, and cellular settings, returning your device’s network configuration to factory defaults. While this is a more drastic step, it often resolves persistent connectivity issues that prevent iMessage activation.
To reset network settings, go to Settings, then tap General. Scroll down and select Transfer or Reset iPhone (or Reset on older iOS versions). Tap Reset, then choose Reset Network Settings. You’ll be prompted to enter your passcode, and the device will restart. After your iPhone reboots, reconnect to your Wi-Fi network or ensure your mobile data is active, then attempt to enable iMessage again by following the steps outlined earlier.
Keep in mind that resetting network settings will require you to re-enter Wi-Fi passwords for all your saved networks. However, this process doesn’t delete any personal data, apps, or messages from your device—it only affects network configurations.
How to Enable iMessage Messages on Multiple Apple Devices
One of iMessage’s most powerful features is its ability to sync across all your Apple devices. If you use an iPad, Mac, or Apple Watch, you can enable iMessage on these devices to send and receive messages seamlessly, regardless of which device you’re using.
Setting Up iMessage on Other Apple Devices
On an iPad, the process is nearly identical to the iPhone. Open Settings, tap Messages, and toggle iMessage on. Sign in with the same Apple ID you use on your iPhone to ensure messages sync across devices. On a Mac, open the Messages app, go to Messages in the menu bar, select Settings (or Preferences in older macOS versions), and sign in with your Apple ID. Check the box next to “Enable this account” to activate iMessage on your Mac.
For messages to sync properly across other Apple devices, all devices must be signed in with the same Apple ID and have iMessage enabled. You should also enable “Text Message Forwarding” on your iPhone if you want to receive SMS messages on your other Apple devices. To do this, open Settings on your iPhone, tap Messages, then tap Text Message Forwarding. Select the devices where you want to receive text messages, and enter the verification code that appears on each device.
Understanding the Difference: iMessage vs SMS Messages
Many iPhone users don’t realize they’re switching between two different messaging systems. When you send a message to another Apple user with iMessage enabled, the message appears in blue bubbles and is sent over the internet. However, when you message someone without iMessage (Android users or Apple users who haven’t enabled the service), your messages turn green and are sent as SMS or MMS messages through your cellular carrier.
iMessage offers several advantages over SMS. You get features like typing indicators that show when someone is composing a response, read receipts that confirm when your message has been seen, the ability to send high-resolution photos and videos, and end-to-end encryption for privacy. These features aren’t available with standard SMS messages or even with RCS messages, although RCS does offer some enhanced features compared to traditional SMS.
If you notice your messages consistently appearing in green bubbles when messaging someone you believe has an iPhone, it could indicate that either they haven’t enabled iMessage, they don’t have an internet connection, or there’s an issue with their iMessage activation.
How to Enable iMessage on iPhone 17 and Latest iOS Versions
For users with the latest iPhone models, including the iPhone 17, the process to enable iMessage remains fundamentally the same, though Apple continues to refine the interface with each iOS update. After setting up your new device, iMessage should automatically activate during the initial setup process if you sign in with your Apple ID.
If you need to manually activate iMessage on a new iPhone, follow these easy steps: unlock your phone, open Settings, scroll down and tap Messages, then tap the toggle next to iMessage to turn it on. The latest iOS versions may require you to confirm your Apple ID credentials during activation. Simply enter your password when prompted, and iMessage will begin activating.
New iPhone models may also prompt you to update iOS if you’re not running the latest software. Keeping your device updated is important for iMessage functionality, as software updates often include bug fixes and improvements to the messaging system. To check for updates, go to Settings, tap General, then tap Software Updates.
Optimizing iMessage Settings for Best Performance
Once you’ve successfully enabled iMessage, you can customize various settings to enhance your messaging experience. In the Settings app under Messages, you’ll find options to enable or disable read receipts, which let senders know when you’ve viewed their messages. You can control whether to send read receipts to all contacts or disable this feature for privacy.
The Messages app also allows you to customize how you send messages. You can enable “Send as SMS” which automatically switches to SMS when iMessage isn’t available, ensuring your messages always get delivered. You can also configure MMS settings for sending multimedia messages to non-Apple users, adjust message preview settings, and manage blocked contacts.
For users who travel internationally, understanding how to optimize these settings is crucial. With a travel eSIM, you can continue using iMessage over your data connection without worrying about international SMS charges. This makes services like BazTel particularly valuable for frequent travelers who want to stay connected with contacts back home while avoiding expensive roaming fees.
Managing iMessage Across Carriers and eSIM
For iPhone users who switch carriers or use eSIM technology, iMessage activation can sometimes require additional attention. When you activate a new carrier service or install an eSIM, your iPhone may need to reactivate iMessage with your new phone number. This process is usually automatic, but you may need to manually deactivate and reactivate iMessage to complete the process.
If you’re using multiple phone numbers through dual SIM functionality (physical SIM plus eSIM), you can choose which number to use for iMessage. Go to Settings, tap Messages, then tap Send & Receive. You’ll see all associated phone numbers and email addresses. Select the one you want to use as your default for starting new conversations by tapping it under “Start new conversations from.”
Ensuring Date and Time Settings Are Correct
An often-overlooked factor in iMessage activation is your device’s date and time settings. If these settings are incorrect, iMessage may fail to activate or function properly. To check your date and time settings, open Settings and tap General. Scroll down and tap Date & Time. Ensure that “Set Automatically” is enabled—this allows your iPhone to automatically adjust for your time zone and daylight saving time.
If automatic date and time setting is already enabled but you’re still having issues, try toggling it off and back on. In rare cases, you may need to manually set the correct date and time, then switch back to automatic. After adjusting these settings, restart your device and attempt to enable iMessage again.
The Role of Internet Connection in iMessage Functionality
iMessage’s reliance on internet connectivity means that your Wi-Fi connection or mobile data quality directly impacts the service’s performance. Unlike SMS messages that work over cellular voice networks, iMessage requires a data connection to send and receive messages. This is why having a reliable internet connection is essential for iMessage activation and ongoing use.
When you’re connected to Wi-Fi, iMessage uses that connection by default. This is ideal when you’re at home or in locations with strong Wi-Fi coverage. However, when you’re away from Wi-Fi, iMessage seamlessly switches to mobile data. For travelers, using a service like BazTel’s travel eSIM ensures you have consistent data connectivity in different countries, allowing iMessage to function reliably without the need for local SIM card swaps.
If you’re experiencing issues with iMessage working properly, check your internet connection first. Try loading a website in Safari or streaming a video to confirm that your connection is active. If you’re on Wi-Fi, move closer to the router or switch to mobile data to see if that resolves the issue. If you’re using mobile data, ensure you haven’t exceeded your data limit and that cellular data is enabled for the Messages app.
Complete Checklist: How to Enable iMessage Successfully
To help you activate iMessage without issues, follow this comprehensive checklist. First, ensure your device is connected to the internet via Wi-Fi or mobile data. Second, verify that you’re signed in to your Apple ID by going to Settings and tapping your name at the top. Third, check that your iOS is up to date by going to Settings, tapping General, then Software Updates.
Next, open Settings and tap Messages. Toggle the iMessage switch on if it’s not already enabled. Wait for the activation message to appear—this may take from a few seconds to several minutes. If activation doesn’t complete within an hour, restart your device and try again. Verify your phone number and email addresses are correctly listed under Send & Receive in the Messages settings.
Finally, send a test message to another Apple user to confirm iMessage is working. If the message appears in blue bubbles, iMessage is functioning correctly. If it appears in green bubbles, check that the recipient has iMessage enabled and that both of you have internet connectivity.
Common Questions About iMessage Activation
Many users wonder why iMessage activation sometimes takes longer than expected. The activation process involves communication between your device, Apple’s servers, and your carrier. Network congestion, carrier delays, or temporary server issues can extend the activation time. Patience is often the best solution—if you’ve followed all the easy steps correctly, iMessage should activate within 24 hours.
Some users also ask whether they need a specific type of phone plan to use iMessage. The service itself is free and doesn’t require any special carrier features. However, since iMessage uses internet data, you’ll need either a Wi-Fi connection or a data plan. The actual iMessage service doesn’t consume much data—text messages use virtually no data, while photos and videos will use more depending on file size.
Maintaining iMessage After Successful Activation
Once you’ve successfully enabled iMessage, maintaining its functionality requires minimal effort. The key is ensuring your Apple ID remains active and that you keep your iOS updated. Apple regularly releases software updates that improve iMessage security and functionality, so staying current with updates is important.
Periodically check your iMessage settings to ensure they’re configured as you prefer. As you add or remove email addresses from your Apple ID, these changes will affect which addresses can receive iMessages. You can manage this by going to Settings, tapping Messages, then tapping Send & Receive to review and adjust your associated contact information.
If you notice iMessage stops working properly at any point, the first troubleshooting step is always the same: try toggling iMessage off and on again in your Settings. This simple action resolves the majority of temporary glitches. If issues persist, work through the more advanced troubleshooting steps outlined earlier in this guide.
Conclusion
Learning how to enable iMessage on your iPhone is essential for taking full advantage of Apple’s ecosystem and staying connected with other Apple users. By following the easy steps outlined in this guide—opening the Settings app, navigating to Messages, and toggling iMessage on—you can activate this powerful messaging service on your device. Remember that iMessage requires an internet connection through either Wi-Fi or mobile data, a signed-in Apple ID, and correct date and time settings.
Whether you’re setting up a new device, troubleshooting activation issues, or optimizing settings across multiple Apple devices, this comprehensive guide provides all the information you need. For travelers, combining iMessage with a reliable data solution like BazTel’s travel eSIM ensures you can stay connected globally without expensive SMS charges, making your international communication seamless and cost-effective.
If you continue experiencing issues after following these steps, don’t hesitate to contact Apple Support or your carrier for additional assistance. With iMessage properly enabled, you’ll enjoy enhanced messaging features, better security, and seamless communication across all your Apple devices.

Blog Author
Peter
Peter started BazTel.co to make mobile internet easier for travellers. He noticed how tough it was to find good network options while visiting new countries. That’s when he built BazTel — a place where anyone can buy eSIMs online without confusion or long steps. He believes tech should be simple and useful, not complicated. When he’s free, he likes to travel, test BazTel himself, and keep improving it based on real user problems.


