 Botswana
 Zambia
 Congo
Congo Colombia
 China mainland
 Chile
Chile Chad
Chad Central African Republic
 Canada
 Cameroon
 Cambodia
 Burkina Faso
 Bulgaria
 Brunei Darussalam
 Brazil
 Aland Islands
 Bosnia and Herzegovina
 Bolivia
 Belgium
 Belarus
 Bangladesh
 Bahrain
 Azerbaijan
 Austria
 Australia
 Armenia
 Argentina
 Algeria

You’re planning Banff, Jasper, and maybe Yukon, too. Nature is grand, but signals can be tricky. This guide helps you pick the best eSIM for Canada for maps, load, tickets open, and family can reach you even when you’re near the trailhead. We’ll keep it simple, no jargon, promise.
Why this matters in parks: towers are far, the weather changes fast, and roaming gets costly. With a good Canada eSIM, you get quick data, fair pricing, and an easy setup on iPhone or Android. If you’re in a hurry, check our curated Canada eSIM plans and compare the best eSIM providers in Canada. Both links open within Baztel.
What you’ll get in this guide:
- Park-first advice (Banff, Jasper, Yukon) and how to handle patchy zones
- When to choose app-based eSIM vs QR activation
- Cross-border options if you drive into the US later
- Quick setup steps, offline prep, and fixes that actually work
If you’re skimming: start with the quick picks, then jump to coverage tips for national parks. And when you’re ready to buy, the Canada eSIM plans page is the fastest path to a working connection.
Quick Picks & Why Parks Matter
Parks are different from cities. Fewer towers. Weather changes. Long distances. So your plan should ride strong national networks (Rogers / Bell / Telus) and allow manual network selection.
What to pick fast
Data first: Choose at least 5–10 GB if you shoot photos to cloud or use maps a lot. Add more if you stream music or post reels—15–20 GB is safer. Turn off cloud backup over mobile data and use offline maps to save GB.
Hotspot allowed: Handy for a friend’s phone or your camera. Some plans cap tethering or slow speed after hotspot—check the plan details. Keep a password, connect one device at a time, and carry a small power bank.
Clear refund policy: If activation fails, you shouldn’t chase support for days. Pick a provider with time-bound refunds and 24×7 chat/email. Save your order ID and take screenshots—makes support faster.
Start browsing: Canada eSIM plans → filter by validity and hotspot. For brand background and user feedback, check the best eSIM providers in Canada.
Why this matters in parks
Valleys block the line of sight. Even 5G areas can drop to nothing in a turn. If the icon shows 5G but pages hang, lock the phone to 4G/LTE and try again. Move a few hundred metres or change direction—one bend can bring the signal back.
Townsites (Banff, Jasper) are usually fine; trails vary a lot: Load maps, tickets, and playlists while you’re still in town. Once you hit trailheads, signal swings—tell someone your route and return time.
Offline prep is your best friend (we cover below): Download offline maps for the full loop and save key pins (hotel, gas, clinic). Take screenshots of passes and bookings so you can show them without data.
How eSIM Works
If you’re new, here’s eSIM in Canada in one minute:
Buy a plan in an app or on the web: Pick data + days that fit your trip; check the hotspot and refund before paying. App flow is faster if you’re already on good Wi-Fi; web is fine if you like email receipts.
Install the eSIM profile (scan QR or one-tap in app): Do it on stable Wi-Fi and screenshot your order ID/QR for safety. If the install hangs, pause, toggle Airplane Mode once, then try again (don’t delete the profile).
Turn on mobile data for that line, keep your home SIM for calls/OTPs if needed. Set the travel eSIM as Primary Data; keep the home SIM only for voice/OTP. Turn Data Roaming ON for the travel eSIM (if required) and OFF for the home SIM.
Pick network mode: 5G/4G Auto is fine. If pages feel unstable, lock to 4G/LTE for a while; it’s often steadier in parks. You can also manually pick Rogers → Bell → Telus to see which tower holds better.
Test: open a map, send a message, done: Load one pin in Maps and send a quick text/photo to confirm data works. If nothing loads, try Airplane Mode for 10–15 sec, then check APN from your plan email.
New to tech? Read What is an eSIM & how it works.
Still got doubts? Visit the FAQ (activation, refunds, device lock).
Coverage in National Parks & Remote Areas (Banff, Jasper, Yukon)
If you want the best eSIM connection for Canada in parks, think like this: townsites = okay; deep valleys & lakes = patchy. Plans that can latch onto Rogers / Bell / Telus give you the best shot.
What to do before you go
- Open the Coverage hub → check your route (Banff → Lake Louise → Icefields → Jasper). Go to the Coverage hub, zoom into valleys and lakes, and trace the full drive both ways. Screenshot weak stretches and mark stops (fuel, café, visitor centre) where you can recheck the signal or Wi-Fi.
- Buy a plan from Canada eSIM plans with hotspot + 5G/4G Auto. Pick data that fits your days on Canada eSIM plans; make sure Hotspot is allowed. Keep 5G/4G Auto on for city parts; if it feels flaky in parks, switch to LTE only and test again.
- Save park pages: Banff • Jasper • Kluane/Yukon (for closures, safety, services). Bookmark/download Banff, Jasper, and Kluane/Yukon before you drive. Print to PDF or take screenshots of shuttle times, trail notices, and emergency numbers for offline use.
- Optional (rough idea only): Rogers / Bell / TELUS coverage tools. Carrier maps help for a glance, but terrain changes result—treat them as approximate only. Your real backup is a solid eSIM + offline maps; use carrier tools just to sanity-check townsites and highways.
Route notes (quick)
Banff townsite, Canmore, Lake Louise: usually fine; on Moraine Lake road, pockets of no signal. Preload maps and shuttle/parking passes in town; if 5G flickers, lock to LTE for steadier data. For weak bends, glance at the Coverage hub and keep the Banff page saved offline.
Icefields Parkway: long stretches with weak data; keep offline maps. Download the full Banff ⇄ Jasper route and pin fuel, viewpoints, and lodges before you drive. Carry a small power bank and be ready to manually switch Rogers → Bell → Telus if pages stall.
Jasper townsite, Maligne Lake: okay near town; drops near the lake bends. Load your trail map in town and share your plan with family; use SMS when data dips. If speeds feel “fake-5G,” switch to 4G/LTE and keep the Jasper page handy for notices.
Yukon/Kluane: remote; expect long zero-bar zones. Carry a power bank, keep eSIM active for SOS/Wi-Fi Calling at lodges. Store permits, IDs, and bookings as PDFs/screenshots; mark fuel and rest stops in advance. Skim Kluane – Plan your visit and assume no live data between settlements—prep first, enjoy later.
Tiny checklist
Download offline maps (Android/iOS): Google’s “Download offline maps” guides. Save the whole route (Banff → Lake Louise → Icefields → Jasper), not just towns. Do the download on hotel Wi-Fi; GPS will still work offline.
Keep eSIM as Primary Data; if data drops, try manual select: Rogers → Bell → Telus. Start on 5G/4G Auto; if pages hang, lock to LTE and test again. After each manual switch, wait 30–60 seconds so the phone latches properly.
Share the plan of the day with family (SMS may work when data doesn’t). Text your route, ETA, and lodge name in the morning; update if plans change. If you hit a zero-bar zone, check in when you reach Wi-Fi at a café or lodge.
App vs QR Card: Getting Your eSIM
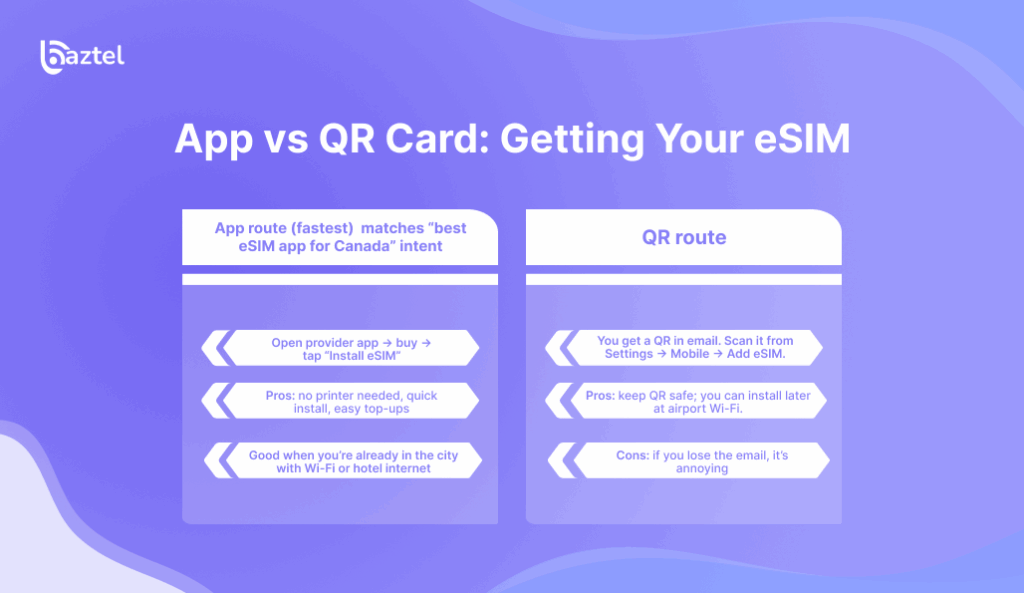
Both methods work well. Choose what suits your prep style.
App route (fastest) matches “best eSIM app for Canada” intent
Open provider app → buy → tap “Install eSIM”. Use stable Wi-Fi during purchase/installation and screenshot your order ID/QR. If the install hangs, toggle Airplane Mode 10–15 sec and try again—don’t delete the profile.
Pros: no printer needed, quick install, easy top-ups. Everything stays in one app, so adding data later takes just a few taps. Fewer failure points than email QR, and reinstallation is easier if the phone resets.
Good when you’re already in the city with Wi-Fi or hotel internet. Do it the night before your drive; city Wi-Fi is steadier than park gates. Run a quick test (map pin + one message) so you’re not debugging on the trail.
QR route:
You get a QR in email. Scan it from Settings → Mobile → Add eSIM.
If the QR is on the same phone, choose Enter details manually and paste the SM-DP+ address + Activation code from the email. Save the QR as a PDF/screenshot (and even print it) so you can install later on stable airport/hotel Wi-Fi.
Pros: keep QR safe; you can install later at airport Wi-Fi.
Works even if you can’t install the provider app (low storage, managed work phone, etc.). Easy for family—open the QR on a laptop/tablet and scan cleanly from your phone.
Cons: if you lose the email, it’s annoying. Some providers limit QR re-issue; star the email and note your order ID in a safe place. Scans can fail on weak/reflective screens—use full screen brightness and steady Wi-Fi.
Help guides: Get eSIM QR code, Manual activation
Device Fit & iPhone Setup
Most modern phones support eSIM, but please check once. Saves airport stress. This is where the best eSIM for Canada iphone matters setup is simple on iPhones.
Check your model: eSIM compatibility list.
Open Settings → About and confirm your model; also look for Add eSIM/Add mobile plan in Cellular. If it’s missing, the phone may be carrier-locked or a region variant—better to verify before you buy.
iPhone steps: How to activate eSIM on iPhone.
Go Settings → Mobile Data → Add eSIM → scan QR or use the provider app; set it as Primary Data. Turn Data Roaming ON for the travel eSIM (if required) and run a quick map/message test.
Official Apple help: Set up eSIM on iPhone.
Covers alternate paths like eSIM Quick Transfer and manual SM-DP+ / activation code entry. If menus look different on your iOS, follow Apple’s screenshots step-by-step and retry.
Tips
- Keep your home SIM active for OTPs; set eSIM as “Cellular Data”. Turn Data Roaming OFF on the home SIM to avoid surprise charges, and keep Voice/Calls default on the home line. For WhatsApp/iMessage, keep your home number as the registered number; only data should come from the travel eSIM.
- Turn on Wi-Fi Calling if your plan supports it; it helps in lodges with weak signals.
iPhone: Settings → Mobile Data → your eSIM → Wi-Fi Calling ON. Android: Settings → Network → Wi-Fi Calling ON. Do a quick test call or message on hotel Wi-Fi; if it fails, toggle Airplane Mode once and retry. - For Android, steps are similar (Settings → Network → eSIM). Paths vary: on Samsung it’s Settings → Connections → SIM manager; on Pixel it’s Settings → Network & Internet → SIMs. After install, confirm APN from the plan email, turn Data Roaming ON for the travel eSIM, and lock to LTE if 5G feels flaky.
Traveller Use-Cases (Visitors, Students, Long Stay)
Your use decides your plan. For visitors who want the best eSIM for Canada travel, focus on simple activation and fair rate per GB.
Short trip (5–10 days) quick buy, 3–5 GB, hotspot allowed
- Link: Best eSIM cards for travellers
- Link: eSIM for travel tips
Students / long stay (30–90 days) — pick larger data, easy top-ups, decent support hours.
Go for 20–40 GB/month or a multi-month pack; check if unused data rolls over and if hotspot is allowed for your laptop.
Prefer one-tap top-ups in the app and 24×7 chat (or hours that match your classes); confirm fair-use so speeds don’t tank mid-semester.
Look for consistent speeds in cities + acceptable park performance.
Run a quick speed test in town; even 10–20 Mbps is fine for maps, chat, and email. On trails, judge stability not peak speed—if maps load and texts send, save reels for lodge Wi-Fi.
Work + road trips wider North America coverage, good for border drives
- See North America eSIM for cross-border.
One Plan for US & Canada (Road Trips + Cross-Border)
Doing Banff → Glacier (Montana) or Jasper → Seattle? A single North America pack keeps life easy. This is the best eSIM for Canada and usa intent.
- Buy once: North America eSIM
- Read more: USA trip with eSIM
What to check in NA packs
- Networks: AT&T/T-Mobile/Verizon (US) + Rogers/Bell/Telus (CA). Let auto-select latch first; if weak, switch manually to the next network and test. Keep the phone on LTE in patchy zones—often steadier than a flaky 5G bar.
- Hotspot: some limit tethering; don’t assume unlimited. Read the plan card—many cap hotspot GB or reduce speed after a threshold. Share with one device at a time and carry a small power bank; hotspot drains fast.
- Fair-use: after X GB, speed may drop—okay for maps, not for 4K reels. When throttled, messaging and maps work, but uploads and reels feel slow. Save heavy stuff for lodge Wi-Fi; lower video quality if you must post.
- Validity: pick a plan that covers total days incl. driving buffer. Add 1–2 extra days for detours, weather, or border delays. Check the timezone and exact expiry hour—some plans cut off at midnight local time.
From Canada to USA (Roaming Outbound)
Already in Canada and dipping into the US? Use a US plan or a NA bundle. This addresses the best eSIM for usa from Canada + related searches.
Fast buy: USA eSIM for Canadians
Pick data + days, install on hotel Wi-Fi, and test in Canada before you cross. Check hotspot and fair-use; once in the US, the plan will latch to AT&T/T-Mobile (auto). Keep your home SIM for OTPs.
How-to: Use eSIM in USA
After the border, toggle Data Roaming ON for the travel eSIM, wait 30–60 sec, then test Maps. If pages hang, lock to LTE, try manual network select (AT&T → T-Mobile), or do an Airplane Mode refresh and recheck APN.
Border tips
- Toggle Data Roaming ON after you cross. Do this for the travel eSIM only; keep roaming OFF on your home SIM to avoid charges. After toggling, wait 10–15 sec or do one Airplane Mode refresh so the phone re-registers.
- Let auto-select work first; if weak, pick AT&T or T-Mobile manually. Give auto a 30–60 sec chance to latch; if pages still hang, lock to LTE and test again. Then try manual select: AT&T → T-Mobile (switch, wait, test); keep one that holds stable data.
- Carry offline maps for border zones (patchy for 30–60 km sometimes). Download both sides of the border the night before (hotel Wi-Fi); GPS works even without data. Use Google’s help if needed: Android offline maps • iPhone offline maps.
Best eSIM for Canada: Plan Comparisons & Pricing
Planning a park trip and confused between data, hotspot, and speed caps? This Best eSIM for Canada: Plan Comparisons & Pricing section puts everything side-by-side data per GB, fair-use limits, hotspot rules, validity, refunds, and which backbone (Rogers/Bell/Telus) each plan rides on. Start with our Canada eSIM plans, then check your route on the coverage hub. Pick what fits your days and budget, not just the cheapest tag. Small tip: test the eSIM on hotel Wi-Fi tonight, before you hit the trail.
| Provider/Plan | Speed/FUP | Hotspot | Coverage Backbone (CA) | Refund/Support notes |
| Baztel Canada 10 GB | 5G/4G (verify FUP) | Yes (verify) | Rogers/Bell/Telus (varies by area) | Clear refund on failed activation |
| North America 10–20 GB | 5G/4G (fair-use after cap) | Often limited (verify) | CA: Rogers/Bell/Telus | One plan for border drives |
| Airalo Canada | 4G/5G (FUP; check plan) | Varies by plan | Rogers/Bell/Telus (partner) | Self-serve app, email support |
| Nomad Canada | 4G/5G (FUP; check plan) | Varies by plan | Rogers/Bell/Telus (partner) | App install; support hours differ |
| Holafly Canada | FUP applies (check) | Varies by plan | Rogers/Bell/Telus (partner) | Check hotspot policy carefully |
| aloSIM Canada | 4G/5G (check) | Varies by plan | Rogers/Bell/Telus (partner) | Email + chat support |
| Ubigi Canada | 4G/5G (check) | Varies by plan | Rogers/Bell/Telus (partner) | Account portal, support SLA |
| 1GLOBAL (Truphone) Canada | 4G/5G (check) | Varies by plan | Rogers/Bell/Telus (partner) | Enterprise-grade backbone |
| Europe Add-On (if continuing trip) | 4G (check FUP) | Usually yes (verify) | Use only if Europe leg exists |
Link out for deeper lists: More Canada plan picks and International options.
How to Choose
This is where many travellers go wrong buying only on price. A quick framework using eSIM in Canada again (once) for relevance:
Coverage first: Check the route on the Coverage hub. Open the Coverage hub, zoom into valleys/lake roads, and trace both directions. Screenshot weak stretches and mark Wi-Fi stops (lodges, cafés, visitor centres).
Hotspot: if 2 phones/camera, you’ll need it: Confirm Hotspot allowed—some plans cap tethering or slow speeds after a limit. Use a strong password, connect one device at a time, and carry a small power bank.
Offline maps: Mandatory for Banff/Jasper drives (see offline guide below): Download the full route with Google’s help: Android guide, iPhone guide. Drop pins for fuel, clinic, trailheads, and your lodge; GPS works offline.
Support hours: India daytime vs Canada night—can you reach someone? Prefer 24×7 chat or support hours that overlap your travel time. Save order ID/ICCID and note the support email/FAQ so you don’t hunt later.
Refunds: clear policy if QR/app fails: Look for time-bound refunds and simple steps (no long forms). Install on hotel Wi-Fi; if it fails, see troubleshooting and FAQ before deleting the profile.
Top-ups: simple add-more without new profile. Choose providers with one-tap top-ups in the app/portal. Check if top-up keeps current validity or starts a new cycle.
For a detailed decision flow, you can also see Using eSIM plans for international travel.
Setup for the Wild
Do this the night before. It saves you from stress inside the park.
Install eSIM at hotel Wi-Fi, not at the gate: City/hotel Wi-Fi is steady, so install and update the profile without hiccups. Screenshot your order ID/QR, then run a tiny test before you sleep.
Download offline maps: Android or iPhone (follow Google’s steps). Save the whole route (Banff → Lake Louise → Icefields → Jasper), not just towns. GPS works offline; downloads need Wi-Fi, so finish it the night before.
Android guide: Download offline maps. Open Google’s help and follow the steps end-to-end: Download offline maps. After download, zoom around the route once to confirm tiles are cached.
iPhone guide: Download offline maps. Same official help page for iOS here: Download offline maps. Keep the app open till it finishes; large park areas take a few minutes.
Turn on Wi-Fi Calling if your plan supports it: Helps inside lodges/cafés where Wi-Fi is good but cellular is weak. Enable it for the eSIM line and test a quick call or message.
Carry a small power bank and a zip bag (rain): Cold + maps + hotspot = fast battery drain, so a 10k mAh pack is enough. A simple zip bag saves your phone from drizzle or boat spray.
Quick test: open a map pin and a web page before you leave town: If it fails, toggle Airplane Mode 10–15 sec and retry. Still no data? Check APN from the plan email and test one more time.
You can reference our usage tips too: How to use an eSIM abroad and Switch between plans on phone.
Troubleshooting in Remote Zones
Don’t panic. Try these in order:
You get a QR in email. Scan it from Settings → Mobile → Add eSIM. iPhone: Settings → Mobile Data → Add eSIM → Use QR Code; Android path is similar under Network/SIM. If QR is on the same phone, use Enter details manually (SM-DP+ address + Activation code from the email).
Pros: keep QR safe; you can install later at airport Wi-Fi: Save the QR as a PDF/screenshot or print it—easy to scan from another screen. Works even if the app store is acting up; no need to install any app to begin with.
Cons: if you lose the email, it’s annoying. Some providers limit QR re-issue; you’ll have to log in and request again. Scans can fail on weak Wi-Fi—move closer, and never share the QR publicly (it’s your key).
Guides to bookmark: Fix common eSIM issues and Brand-specific fixes: Airalo not working.
Conclusion
Canada’s parks are stunning and a little unforgiving with signals. Pick the best eSIM for Canada that rides on Rogers/Bell/Telus, allows hotspot, and has clear fair-use rules. Install on hotel Wi-Fi, download offline maps, keep Wi-Fi Calling on, and if data dips, switch networks manually. For border drives, a single North America pack keeps the trip simple.
Ready to go? Compare and buy on Canada eSIM plans, check your route on the coverage hub, or choose North America eSIM if the US is on your map. Safe travels enjoy the trails. If you’re still unsure, start small. Buy a mid-size pack, test speed in town, then top up. Keep hotspot on if you’re sharing with family. Creators should watch fair-use limits (video uploads eat data fast). Save APN details, try manual network selection if pages don’t load, and keep our troubleshooting guide handy. Little prep now means a calm, happy trip later.
FAQs
What are the main types of plans?
Canada-only, North America bundle (US+Canada), and global. For park drives, Canada-only is fine unless you cross the border. Compare Canada eSIM plans.
How do eSIMs make money / what fees to watch?
You pay for data and validity days. Some add convenience fees or small order fees. Check hotspot rules and fair-use. For broader context, see best eSIM providers in Canada.
How can I choose the right model for my trip?
Match route + days + data needed. Use our Coverage hub and the checklist above. If you’ll cross the border, go for North America eSIM.
Do services offer customer support?
Yes, most have chat/email. Keep order ID and ICCID handy. If something breaks, follow the troubleshooting guide first.
How are delivery/activation fees decided?
Usually the final price includes activation. If you see extra fees, it’s often taxes or payment charges. QR vs app install cost is usually the same, just different flow. Read the plan page once before paying.
Is there a single plan for US & Canada?
Yes, check North America eSIM, good for road trips.
Which iPhone models support eSIM?
Most recent ones. Confirm in compatibility list and Apple’s page Set up eSIM on iPhone.

Blog Author
Peter
Peter started BazTel.co to make mobile internet easier for travellers. He noticed how tough it was to find good network options while visiting new countries. That’s when he built BazTel — a place where anyone can buy eSIMs online without confusion or long steps. He believes tech should be simple and useful, not complicated. When he’s free, he likes to travel, test BazTel himself, and keep improving it based on real user problems.


